Crafting a Shearling Coat: A Step-by-Step Guide
Shearling coats have long been cherished as a quintessential piece of outerwear, known for their unique blend of luxurious comfort and durable functionality. Originating from the practical necessity of warmth in harsh climates, shearling coats have evolved into highly-coveted fashion staples. These garments are crafted from sheepskin with the wool still attached, offering an exceptional balance of insulation and breathability that few other materials can match.
The history of shearling coats dates back centuries, with their use recorded in various cultures around the world, from the Mongolian steppes to the European countryside. Historically, shearling was prized for its ability to retain body heat, making it indispensable to those braving frosty winters. Over time, its aesthetic appeal and sumptuous feel have driven its popularity, elevating it from a utilitarian garment to a symbol of timeless style and sophistication.
One of the most defining characteristics of shearling is its incomparable warmth-to-weight ratio. Unlike bulky synthetic alternatives, shearling provides substantial warmth without overwhelming heaviness. This natural insulation is complemented by the coat’s softness, which is a constant reminder of the wool’s plush origins. Additionally, shearling is renowned for its durability. When cared for properly, a shearling coat can last for decades, often becoming a treasured family heirloom.

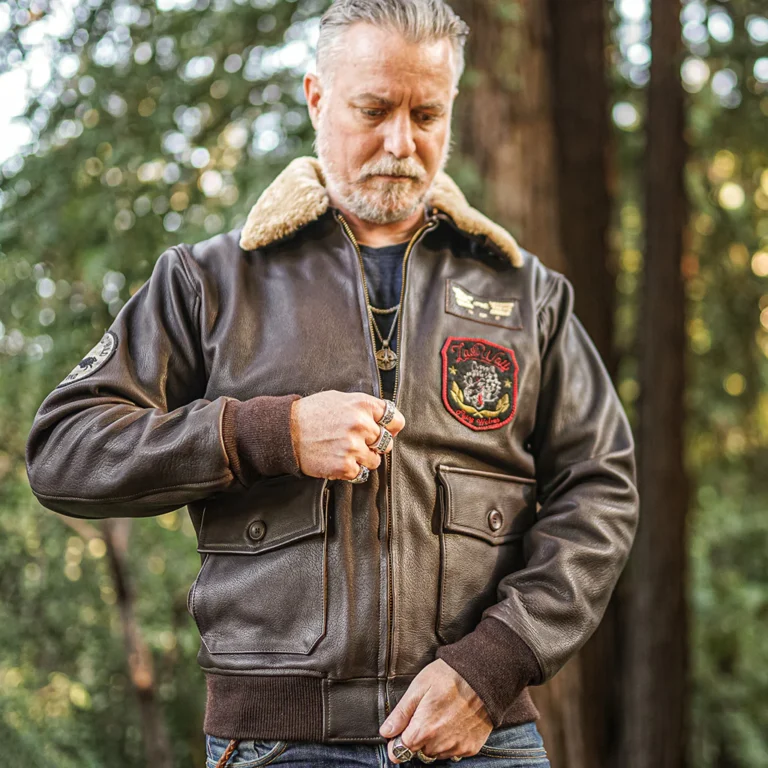
Shearling coats come in a variety of styles and designs, each with its unique charm. From classic aviator jackets characterized by their rugged appeal to long, luxurious overcoats that exude elegance, there’s a shearling garment to suit every personal taste. Designers have also embraced shearling in contemporary fashion, creating innovative and stylish pieces that continue to capture the imagination of trendsetters and fashion enthusiasts alike.
As we delve deeper into the art of crafting shearling coats, the forthcoming sections will provide a detailed, step-by-step guide, enabling you to appreciate the meticulous process behind these beloved outerwear pieces.
Selecting the Right Materials and Tools
When embarking on the journey to craft a shearling coat, choosing the right materials and tools is paramount. The foundation of your coat lies in the selection of high-quality shearling hides. Shearling, which is the pelt of a young sheep with the wool still attached, varies significantly in texture, thickness, and color. These variations have a profound impact on both the comfort and appearance of the final product. When selecting your hide, consider the intended use of the coat and desired aesthetics. For a luxurious finish, choose hides that are soft and uniformly thick.
Beyond the shearling hides, several other materials are essential in the construction of a shearling coat. Strong, durable thread is necessary to ensure the seams hold up to wear and tear. Opt for a color that blends seamlessly with the hide for an unobtrusive finish. Zippers and other closures must be robust, yet aesthetically pleasing. High-quality zippers, preferably made of metal, are recommended for their durability and classic look. Linings can add an extra layer of comfort and warmth, so consider materials that complement the shearling such as satin or silk for a luxurious feel, or cotton for a more breathable option.

The tools required for making a shearling coat include fabric scissors, which should be sharp enough to handle the thickness of the shearling. Needles must be sturdy, with some specifically designed for heavy-duty sewing. A heavy-duty sewing machine is also beneficial, as it can manage the dense material without breaking down. Cutting mats can protect your work surfaces and ensure precise cuts, which is critical for creating clean, professional seams. Other useful tools include tailor’s chalk for marking measurements, and a rotary cutter for even more precise cutting.
In conclusion, investing time in selecting superior materials and tools will significantly influence the durability, comfort, and aesthetics of your shearling coat. The right choices will ensure that your coat not only meets but exceeds your expectations, providing long-lasting wear and timeless style.
Step-by-Step Sewing Process
The creation of a shearling coat begins with thorough preparation. Start by drafting and cutting the patterns according to precise measurements. Use a pattern paper and pen to outline the body, sleeves, collar, and other pieces of the coat. It’s essential to account for seam allowances, typically a quarter to half an inch, to ensure proper fitting.
Next, transfer your pattern onto the shearling material. Carefully cut out each piece, paying close attention to the grain and nap of the fur. Shearling is a thick, bulky material, so using sharp, heavy-duty scissors or a rotary cutter can make the process smoother. Once your pieces are ready, it’s time to start sewing.

Begin by assembling the body of the coat. Matching the right sides together, sew the side seams from the bottom hem to the armholes using a sturdy sewing machine or leather-specific sewing machine.
Attach the sleeves by aligning the sleeve cap with the armhole, pinning in place, and sewing around the curve. Ensure even distribution to avoid puckering. Reinforce this seam with an additional stitch for added durability.
For the collar, align the edges and sew it to the neckline, ensuring the nap of the fur lies smoothly. This step might require a bit more patience due to the bulk of the material. Once aligned correctly, top-stitch along the collar’s edge for a neat finish.
Next, focus on the linings and pockets. For lining, cut pieces from a softer, thinner fabric like satin or silk. Sew the lining pieces together and insert them inside the coat, securing them with a slip stitch along the hem, sleeves, and collar. Pockets can be sewn externally or within the lining, depending on the design preference. Top-stitch the pockets for a polished look.
Lastly, add closures such as buttons, zippers, or toggles.
Throughout the sewing process, handle shearling material delicately to prevent stretching or damaging the fibers. Regularly check the fit and make adjustments as necessary.
Finishing Touches and Care Tips
Once you have assembled your shearling coat, the final steps are crucial for ensuring both its aesthetic appeal and durability. Begin by carefully hemming the coat. Use a sturdy, durable thread to ensure a clean, strong hem that can withstand regular wear. Pay special attention to the edges, making sure they are even and well-finished to give your coat a polished look.
Attaching accessories, such as buttons, zippers, or decorative elements, can add a personal touch to your shearling coat.When attaching buttons, reinforce them with a layer of interfacing fabric for added durability. For zippers, test their function multiple times to ensure smooth operation.
The finishing touches wouldn’t be complete without a comprehensive quality check. Inspect all seams to make sure they are secure and there are no loose threads.
Proper care is pivotal for maintaining the luxurious feel and longevity of your shearling coat. Cleaning a shearling coat requires specialized attention. Most often, professional cleaning is recommended to prevent damage. For minor stains, gently blot with a damp cloth and avoid using harsh chemicals.
Store your shearling coat in a cool, dry place, ideally in a breathable garment bag to protect it from dust while allowing ventilation. Avoid hanging it in direct sunlight, as prolonged exposure can affect the coat’s texture and color.
By following these finishing touches and care tips, you can ensure your shearling coat remains a stylish and durable garment for many seasons to come.


