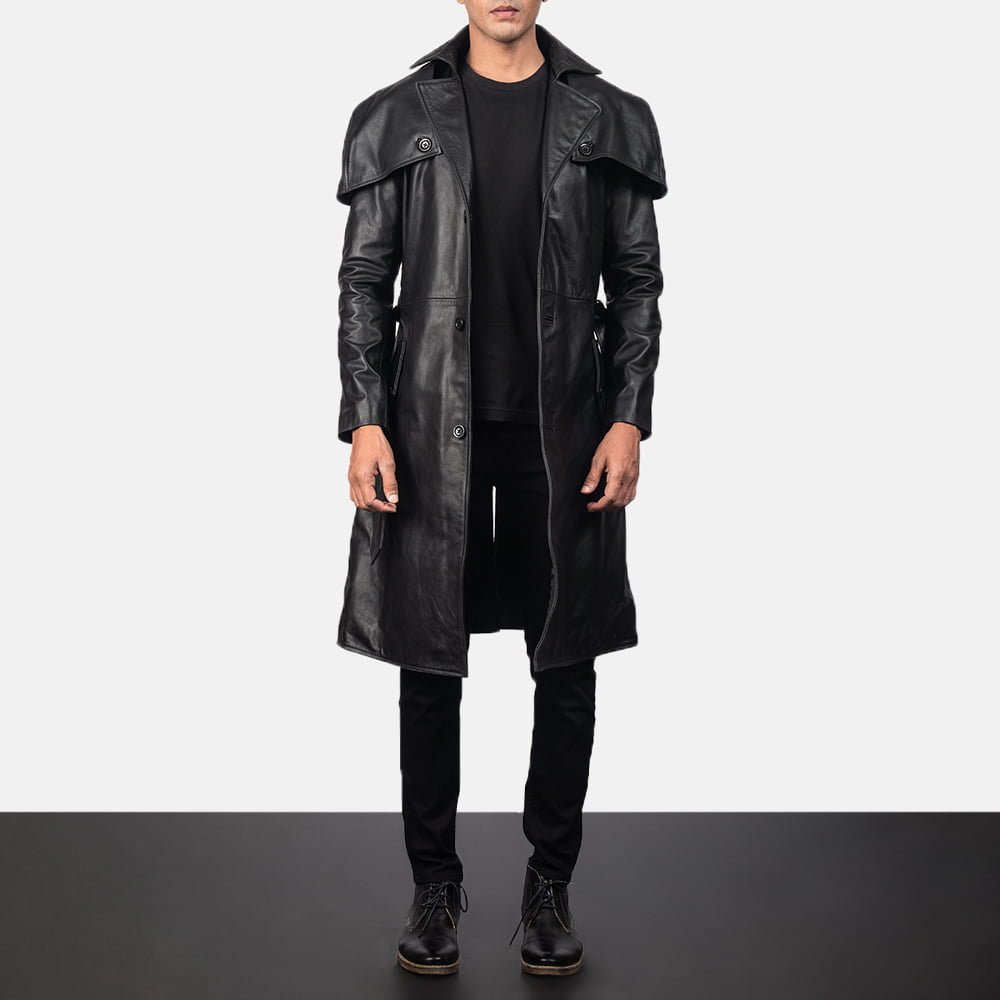
How to Make a Duster Coat?
Understanding the Duster Coat: History and Design
The duster coat has a rich history that reflects both practical needs and evolving fashion trends. Originally designed in the late 19th century, this versatile outerwear was worn by cowboys and travelers to protect their clothing from dust while riding on horseback. Its loose-fitting design allowed for ease of movement, while the long length offered protection against the elements, making it ideal for the rugged and often dusty terrains of the American West.
As time went on, the duster coat transitioned from a purely functional piece to a fashionable staple within various social contexts. During the early 20th century, it found its place among motoring enthusiasts, serving as both a protective garment and a stylish accessory for automobile travel. Influences from European fashion also contributed to the duster’s evolution, leading to the incorporation of luxurious fabrics and tailored silhouettes that elevated its aesthetic appeal.
Today, the duster coat is celebrated for its versatility and usability across different occasions. The typical design features of the duster include a long, flowing silhouette, usually reaching the ankles, and an open front that allows for layering. Materials such as cotton, linen, and wool are commonly used, providing varying degrees of warmth and texture suitable for different seasons. Style variations, ranging from minimalist and modern to bohemian and vintage, cater to a diverse range of fashion preferences.

In addition to its visual appeal, the duster coat serves multiple functions. It can easily transition from daywear to evening wear, depending on how it is styled. Layered over casual outfits or elegant dresses, the duster adds a touch of sophistication while maintaining an air of relaxed ease. Understanding the historical significance and design nuances of the duster coat enhances one’s appreciation of this timeless garment, which continues to adapt and inspire in contemporary fashion.
Materials and Tools Needed for Your Duster Coat
Creating a duster coat requires careful selection of materials and tools to ensure a successful sewing project. The fabric choice is crucial since it affects the coat’s overall appearance, comfort, and functionality. Ideal fabric types for duster coats include cotton, denim, or lightweight wool. For a standard-sized duster coat, you will typically need around 2 to 4 yards of fabric, depending on the desired length and size. Cotton is a breathable option for warmer climates, while denim offers durability, and lightweight wool is perfect for cooler weather. Consider the drape and weight of the fabric, as these factors will impact the final look of the coat.

In addition to fabric, you will require several essential tools to facilitate the construction process. A sewing machine is perhaps the most critical tool, as it allows for the precise stitching needed for a structured coat. Scissors specifically designed for fabric will ensure clean cuts, which are vital for achieving professional results. Furthermore, a measuring tape is necessary for taking accurate measurements, which can help avoid fit issues later on.
Pattern templates are also integral to creating your duster coat. They guide your cuts and stitches, ensuring consistency and symmetry in the design. Patterns can be purchased from fabric stores or downloaded from various online sources. Before starting your project, it might be prudent to gather all materials and tools, as this preparedness will streamline the sewing process.
Finally, sourcing high-quality materials contributes significantly to the coat’s durability and overall aesthetic. Fabric stores, online retailers, and specialty shops often offer a variety of fabrics suitable for jackets. Always opt for reliable sources to guarantee that the components of your duster coat meet your expectations.
Step-by-Step Instructions for Constructing Your Duster Coat
Constructing a duster coat requires careful preparation and precise execution. To start, gather your materials, including fabric, thread, scissors, a sewing machine, and measuring tools. Begin by taking your measurements—chest, waist, hip, and length—recording them accurately, as these will determine the size and fit of your duster coat.

Next, lay out your fabric on a flat surface. Use a fabric marker to trace the pattern pieces according to your measurements, ensuring that you account for seam allowances. Cut the fabric pieces carefully, being mindful of any fabric grain directions, which can affect drape and fit. Once cut, organize your pieces, separating the main body, sleeves, pockets, and any lining material.
Begin assembling the coat by sewing the back and front panels together along the shoulders. Ensure the seams are neat and flat, as this will affect the overall finish of the duster coat. When the body is assembled, it’s time to attach the sleeves. Align the sleeves to the armholes of the coat, pinning them in place before sewing. For a comfortable fit, consider setting in the sleeves with ease, which allows the fabric to drape better.
For added functionality, create and attach pockets to the duster coat. Decide on the pocket placement (such as at the sides or front) and cut appropriate openings in the fabric. Sew the pockets to the body of the coat securely. Additionally, as you finish the coat, adding closures such as buttons or snaps will provide both style and utility.
Before completing the project, try on the duster coat to ensure proper fit. Make necessary adjustments, like taking in sides or lengthening sleeves, for a customized appearance. With these steps, you will create a duster coat that embodies your style while fitting comfortably.
Finishing Touches and Styling Your Duster Coat
Once the primary construction of your duster coat is complete, the finishing touches play a pivotal role in elevating its appearance and functionality. Hemming is crucial, as it ensures a clean edge and the overall polish of the custom garment. To achieve the desired length, try the coat on and adjust accordingly. A straight stitch is typical for a simple hem, but consider a blind hem for a more professional look. Additionally, double-checking the hem will help maintain the coat’s structure and ensure longevity.

Incorporating decorative elements can personalize your duster coat and make it uniquely yours. Consider adding embroidery or patches that reflect your individuality. Simple floral designs can enhance sleeves or pockets, while patches can tell a story about your interests. Be mindful of the placement to keep the duster coat looking elegant, particularly if it is for casual wear. You can also add practical elements, such as an inside pocket for carrying essentials, integrating functionality with fashion.
When it comes to styling your duster coat, versatility is key. For a chic daytime look, pair the coat with a fitted t-shirt and high-waisted jeans. Layering over a dress can also create a stunning transition into evening wear. Select the right footwear to complement the coat—ankle boots for a trendy appearance or classic heels to elevate the ensemble. Accessories play a crucial role in your overall styling; consider belts to cinch the waist for a tailored silhouette or scarves for added flair. No matter the occasion, your handmade duster coat can serve as a timeless addition to your wardrobe.
Ultimately, the finishing touches and styling choices define the personality of your duster coat, allowing you to showcase your creativity and foster a sense of personal style.


